How to Organize NotebookLM: The Complete Guide
Learn how to organize your NotebookLM notebooks, sources, and prompts with a simple system using collections, tags, folders, and reusable prompts.
Whether you use NotebookLM for research, studying, writing, or work, this guide shows you how to keep your workspace organized as it grows.
Build a cleaner NotebookLM workflow from your notebooks to your individual sources.
How to Organize NotebookLM
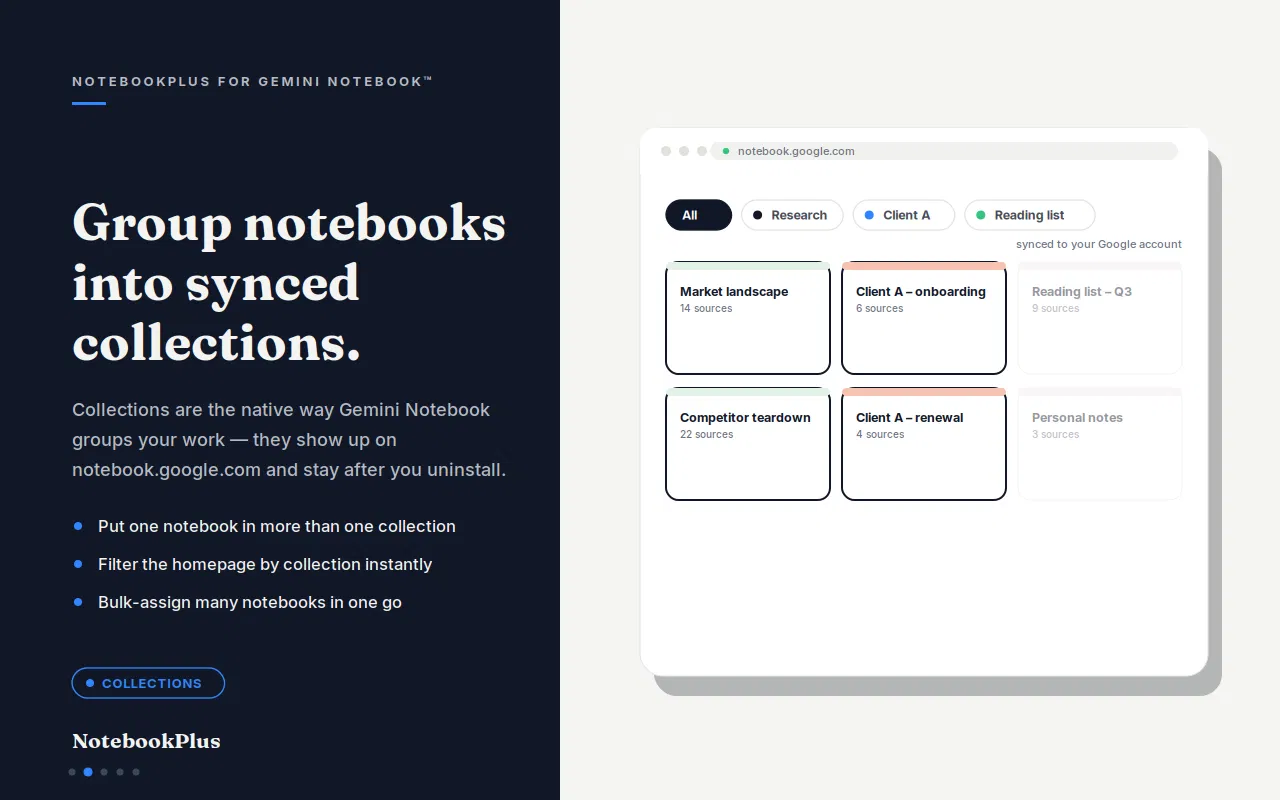
Collections
Organize groups of notebooks
Tags
Categorize notebooks
Folders
Organize sources
Prompt Manager
Organize reusable prompts
Quick Answer: How Should You Organize NotebookLM?
The easiest way to organize NotebookLM is to organize your workspace at different levels:
- Collections — group related notebooks together.
- Tags — categorize and filter notebooks across your library.
- Folders — organize sources inside individual notebooks.
- Prompt Manager — save and reuse prompts for repeated tasks.
A simple structure looks like this:
Library → Collections → Notebooks → Source Folders → Sources
And alongside this structure:
Prompt Library → Reusable prompts
This layered approach works well when you have many notebooks and sources because each organization method solves a different problem. You do not need every layer on day one. Start with collections if your notebook list is getting long. Add tags when notebooks belong to more than one category. Add source folders when a single notebook becomes hard to scan. Save prompts when you notice yourself typing the same instruction again.
Why Should You Organize NotebookLM?
NotebookLM works best when your sources are relevant and easy to manage.
A notebook is built around a collection of sources for a specific project, and each notebook is independent.
That independence is useful: one notebook can stay focused on a course, a client, or a research question. It also means organization does not happen automatically as your library grows.
As you create more notebooks and add more sources, your workspace can quickly become difficult to navigate.
You may end up with:
- Dozens of notebooks
- Hundreds of research sources
- PDFs from different projects
- Web pages and YouTube videos
- Multiple versions of similar research
- Repeated prompts and instructions
Without a consistent organization system, it becomes harder to find the right notebook, source, or prompt. You spend time searching instead of reading, comparing, or writing.
A good NotebookLM organization system helps you:
- Find information faster
- Separate different projects
- Group related sources
- Reduce duplicate work
- Reuse successful prompts
- Keep large research projects manageable
The goal is not to add extra structure for its own sake. The goal is to make the next notebook, source, or prompt easy to find when you need it.
Understand the Different Levels of NotebookLM Organization
The key to a good NotebookLM workflow is understanding what you are trying to organize. Collections, tags, and folders are not the same layer — they solve different problems.
If you mix these layers, the system gets harder to maintain. A collection is too coarse for a single source. A source folder is too detailed for your entire library. Tags sit between those layers: they cut across notebooks without replacing collections or folders.
Level 1: Collections
Collections are useful for grouping entire notebooks into larger projects or categories.
For example:
Work
- Marketing Research
- Product Research
- Competitor Analysis
Level 2: Tags
Tags provide a flexible way to categorize notebooks. A notebook can have multiple tags, which makes tags useful for filtering your notebook library.
A notebook can have multiple tags such as:
- Research
- Important
- Client A
Level 3: Source Folders
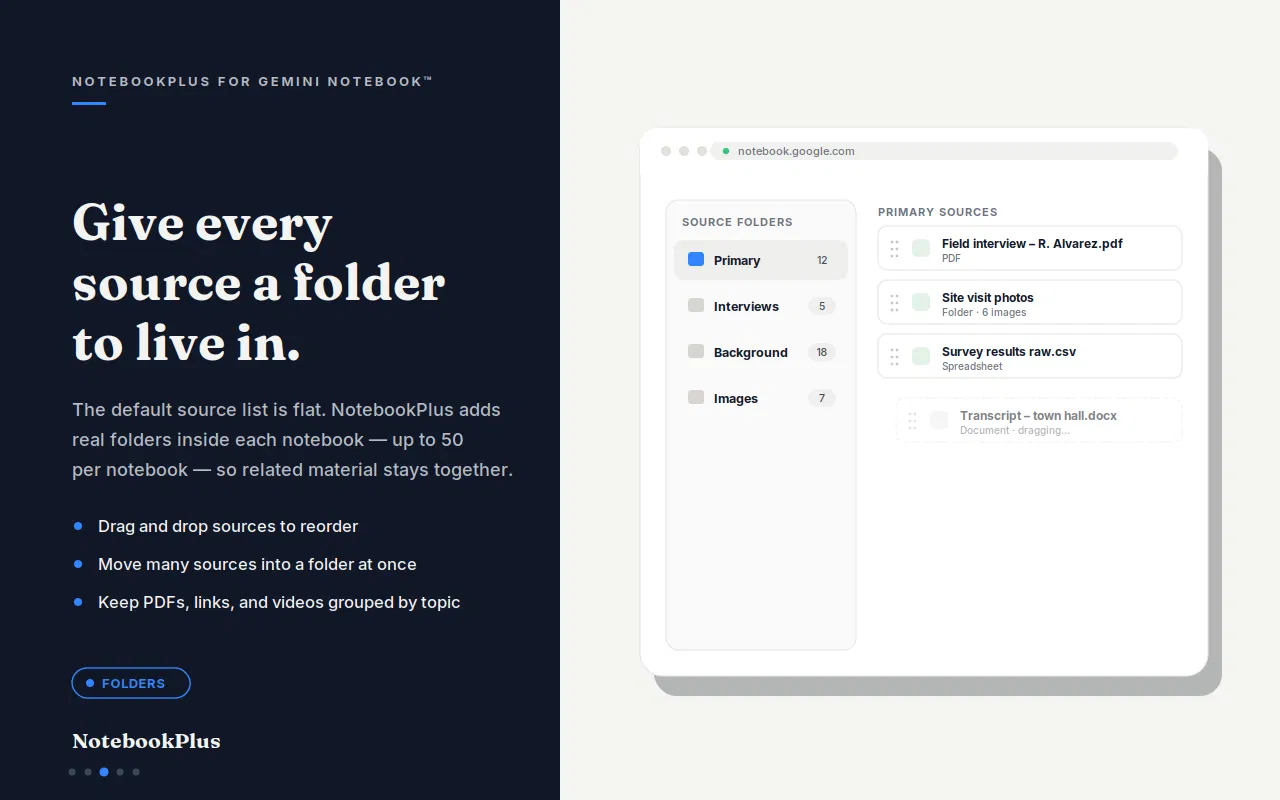
Folders organize the sources inside an individual notebook.
For example:
Marketing Research
- Competitors
- Customer Research
- Market Reports
- References
Level 4: Prompt Library
Prompts are different from notebooks and sources. A reusable prompt is an instruction you may want to use across many different notebooks. A dedicated prompt library keeps these instructions separate from your research materials.
Step 1: Organize Your Notebooks with Collections
Start at the highest level: your notebooks. If you have many notebooks for different projects, group related notebooks into broader categories. Think of collections as rooms in a library, not as labels on every shelf.
For example:
Work
├── Product Research
├── Competitor Analysis
├── Marketing
└── Customer Research

Study
├── Biology
├── Computer Science
├── Mathematics
└── History

Personal
├── Travel
├── Learning
└── Personal Projects
Collections can help you group related notebooks into broader categories such as Work, Research, Study, or Personal.
The goal is not to create a collection for every small category.
Use collections for large groups of related notebooks.
Good Collection Names
Use names that describe the overall project or area:
- Work
- School
- Research
- Clients
- Personal
- Content
- Projects
This creates a high-level structure before you start organizing individual sources. Once the large groups are in place, it is easier to decide which notebooks need tags, folders, or both.
Need more control over your NotebookLM library?
NotebookPlus adds additional organization tools for NotebookLM, including notebook tags and source folders.
Step 2: Use Tags to Categorize Your Notebooks
Collections are useful for broad groups, but sometimes a notebook belongs to several categories.
That's where tags become useful.
For example, a notebook called:
AI Market Research
could have:
Research
AI
Business
Important
Instead of creating separate collections for every combination, you can use tags as flexible categories. Collections answer “where does this notebook live?” Tags answer “which notebooks share this property?”
Use Tags for Cross-Cutting Categories
Good tag examples include:
- Research
- Important
- Active
- Archived
- Client
- AI
- Study
- Writing
- Work
Use Colors to Recognize Categories
Color-coded tags make your library easier to scan visually.
Use Tags to Filter
When you need a specific group of notebooks, filter by tag instead of scrolling through the entire library.
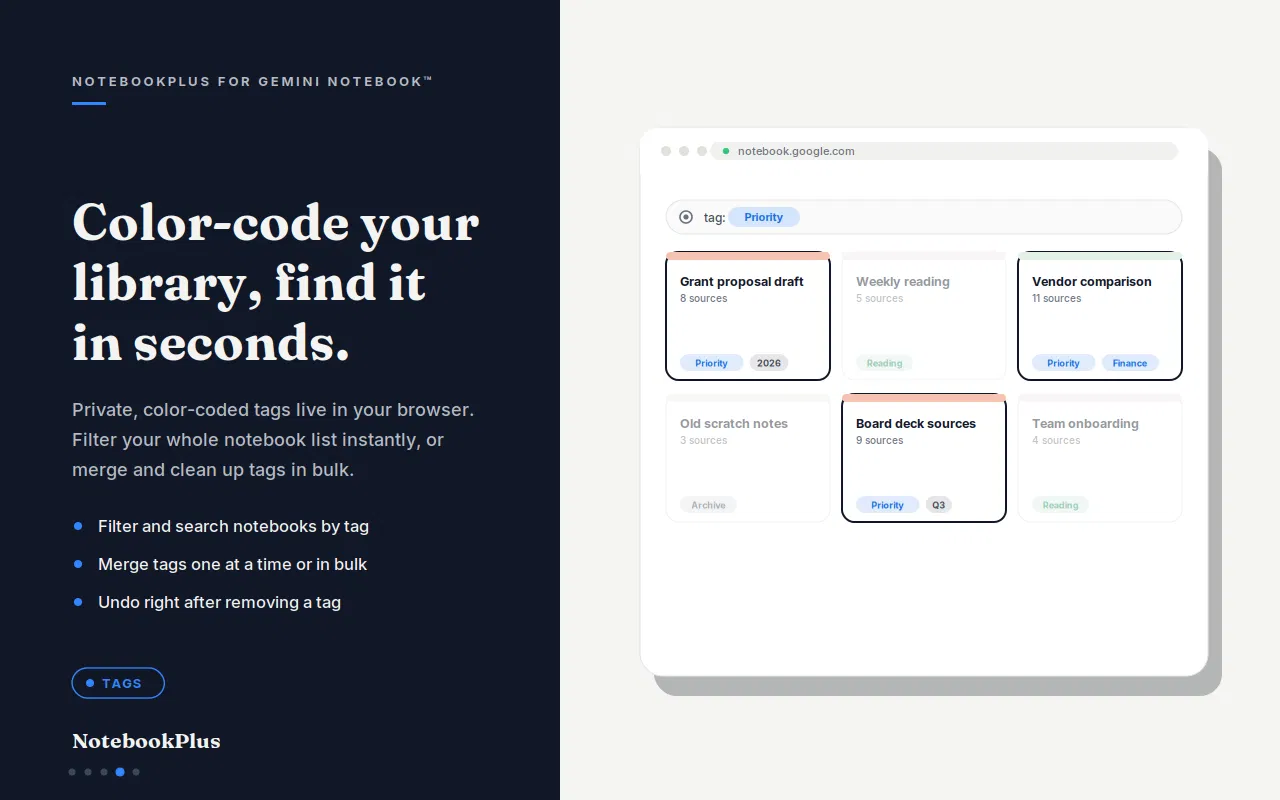
Learn more about NotebookLM Tags and how to organize your notebook library with color-coded categories. NotebookLM Tags.
Step 3: Organize NotebookLM Sources with Folders
Once your notebooks are organized, organize the sources inside each notebook.
A single NotebookLM project might contain:
- Research papers
- Websites
- Reports
- Videos
- Interview transcripts
- Project documents
Putting everything into one long source list can make large notebooks harder to manage. Create source folders based on how you use the materials, not based on every possible label you might need later.
For example:
Product Research
│
├── Market Research
├── Competitors
├── Customer Interviews
├── Product Documents
└── References
If you're starting a new project with many sources, you can bulk import sources into NotebookLM before organizing them.
Organize by Topic
Group sources that cover the same subject.
Organize by Source Type
For example:
- Papers
- Videos
- Websites
- Reports
Organize by Research Stage
For example:
- Background
- Research
- Analysis
- Final References
What About NotebookLM's Built-In Source Organization?
NotebookLM already provides source-level organization features.
When a notebook contains 5 or more sources, NotebookLM can automatically label and categorize sources by topic. You can also manually create, rename, delete, and move sources between labels.
NotebookPlus takes a different approach by adding source folders to help users build a more explicit folder-based structure.
You can choose the approach that best fits your workflow—or use both together. Built-in labels are useful when you want NotebookLM to group sources by topic. Folders are useful when you already know the structure you want, such as Interviews versus Reports, and want that structure to stay visible as the notebook grows.
If you want a dedicated folder structure for your sources, see our complete guide to organize NotebookLM sources with folders.
Step 4: Organize and Reuse Your NotebookLM Prompts
Organization isn't only about notebooks and sources. If you repeatedly ask NotebookLM to perform the same tasks, your prompts should also have a system. A prompt library is not another way to file PDFs or notebooks. It is a place for the instructions that turn those sources into summaries, comparisons, study guides, or drafts.
For example, you might regularly use prompts for:
- Summarization
- Research analysis
- Source comparison
- Study guides
- Question generation
- Writing
- Information extraction
Instead of storing these prompts in random notes or documents, create a reusable prompt library.
Example Prompt Categories
Research
├── Summarize Research
├── Analyze Evidence
└── Compare Sources

Study
├── Create Study Guide
├── Generate Questions
└── Explain Concepts

Writing
├── Create Outline
├── Rewrite
└── Extract Key Ideas
With NotebookPlus Prompt Manager, you can save, categorize, search, favorite, and reuse your prompts. Keep this library next to your notebook system rather than mixing prompts into source folders or notebook titles.
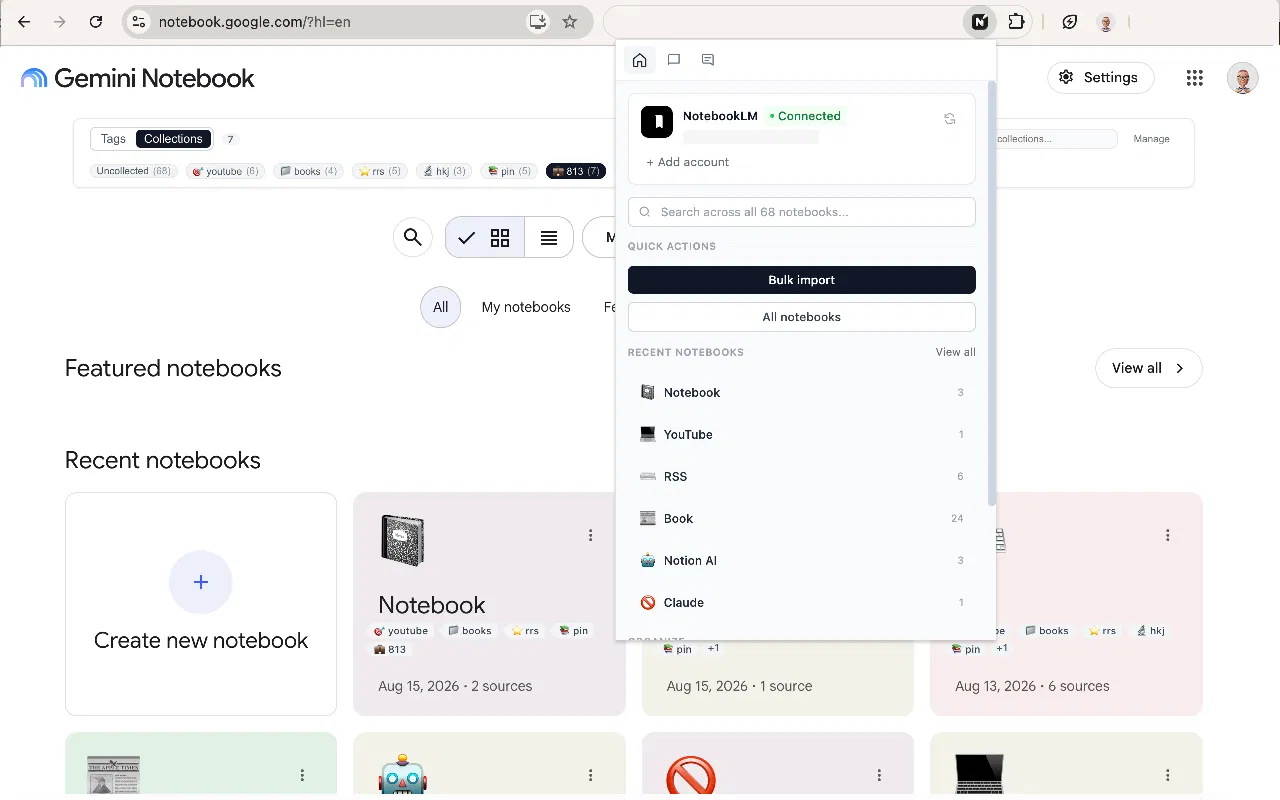
Learn more about NotebookLM Prompt Manager.
Build a Complete NotebookLM Organization System
A simple system can look like this:
YOUR NOTEBOOKLM LIBRARY
│
├── Collections
│   │
│   ├── Work
│   ├── Research
│   ├── Study
│   └── Personal
│
├── Tags
│   │
│   ├── Important
│   ├── Active
│   ├── Research
│   └── Client
│
└── Notebooks
    │
    ├── Product Research
    │   │
    │   ├── Market Research
    │   ├── Competitors
    │   ├── Interviews
    │   └── References
    │
    └── Academic Research
        │
        ├── Papers
        ├── Books
        ├── Websites
        └── Notes

PROMPT LIBRARY
│
├── Research
├── Study
├── Writing
└── Analysis
The important principle is to use each tool for a different job:
Collections
broad notebook groups
Tags
flexible notebook categories
Folders
source organization
Prompt Manager
reusable instructions
When those jobs stay separate, the system scales. You can add a notebook without inventing a new collection, add a tag without moving sources, and add a folder without renaming the notebook. Prompt categories can grow independently of your research materials.
Example: Organizing NotebookLM for Research
Imagine you're researching the AI industry. You might create:
Collection
- AI Research
Notebooks
- AI Market Research
- AI Competitor Analysis
- AI Product Research
- AI Academic Papers
Tags
- AI
- Research
- Active
Source Folders
Inside AI Market Research:
- Market Reports
- Competitors
- Statistics
- News
- References
Prompt Library
- Summarize Research
- Compare Companies
- Extract Statistics
- Identify Trends
- Find Contradictions
This structure separates projects while keeping your research materials easy to navigate. You can open one notebook for a focused question, or filter the library when you need every active AI project at once.
Example: Organizing NotebookLM for Students
A student might organize their workspace like this:
Collections
- University
Notebooks
- Biology
- Computer Science
- Mathematics
- History
Tags
- Semester 1
- Exam
- Important
Source Folders
Inside Biology:
- Lecture Notes
- Textbooks
- Research Papers
- Assignments
- Exam Materials
Prompt Library
- Explain Concept
- Create Study Guide
- Generate Quiz Questions
- Summarize Chapter
- Compare Theories
This keeps each course in its own notebook while tags surface exam-related work across subjects. Source folders then keep lecture notes separate from exam materials inside a single class.
Example: Organizing NotebookLM for Business
For a business workflow, you could organize NotebookLM like this:
Collections
- Clients
- Internal
- Product
Notebooks
- Client A Research
- Client B Research
- Product Research
- Competitor Analysis
Tags
- Active
- Client A
- Important
- Research
Source Folders
Inside Client A Research:
- Meeting Notes
- Customer Research
- Competitors
- Reports
- References
Prompt Library
- Meeting Summary
- Extract Action Items
- Competitor Comparison
- Customer Insights
- Executive Summary
Collections separate client work from internal and product research. Tags mark what is active right now. Folders keep meeting notes from mixing with reports inside a client notebook.
How to Keep NotebookLM Organized
Creating an organization system is only the first step. Use a few simple rules to keep it useful as notebooks and sources continue to arrive.
1. Don't Create Too Many Categories
Start broad. Instead of creating 30 tags, begin with 5–10 categories that you actually use. You can always split a category later. It is harder to merge twenty overlapping tags once they are already on dozens of notebooks.
2. Give Notebooks Clear Names
Use descriptive names such as AI Competitor Research — 2026 instead of Research 2. A clear name makes collections and tags more useful, because you can recognize the notebook before you open it.
Use: AI Competitor Research — 2026
Instead of: Research 2
3. Keep Folder Names Consistent
If you use Research, don't create similar folders such as Research Materials, Research Docs, or Research Stuff unless they serve different purposes. Consistent names make it easier to move between notebooks without relearning the structure.
4. Archive Old Projects
Separate active projects from completed or inactive ones. An archive tag, an inactive collection, or a simple naming convention keeps finished work available without crowding the notebooks you use every day.
5. Review Your Organization Regularly
Every few weeks, remove unused tags, merge duplicates, and reorganize sources that have accumulated in the wrong place. A short review is usually enough. The system should stay small enough that you still want to use it.
6. Save Repeated Prompts
If you write the same NotebookLM instruction more than once, consider saving it in your prompt library. That is often the fastest way to keep output consistent across notebooks without rewriting the same research or study workflow.
NotebookLM Organization Checklist
Use this checklist when cleaning up your NotebookLM workspace:
- Group related notebooks into Collections
- Add tags to important notebooks
- Create source folders for large notebooks
- Group sources by topic or project
- Rename unclear notebooks
- Remove duplicate or unnecessary tags
- Merge similar tags
- Archive completed projects
- Save frequently used prompts
- Organize prompts into categories
- Export important prompt libraries for backup
- Review your organization system regularly
A good organization system should make your work faster—not create more work. If a category, folder, or tag is not helping you find something, simplify it.
Frequently Asked Questions
Ready to Organize Your NotebookLM Workspace?
A well-organized NotebookLM workspace makes it easier to find your notebooks, manage your sources, and reuse the workflows that work best for you.
NotebookPlus adds practical organization tools for NotebookLM, including:
- Collections
- Tags
- Source Folders
- Prompt Manager
- Bulk Import
Start organizing your NotebookLM workflow today.